DIY tank top.

As mentioned before, I went to a trivia night at a bar with coworkers last week and we came in third place. Yay! We won tee shirts, but they’re men’s extra large. Boo! I scoured Google, Pinterest, and my WordPress “Blogs I Follow” for how to DIY a cute tank top from this huge shirt without sacrificing the awesome logo on the front and with minimal disappearance of the logo on the back. I’ve done this kind of thing a few times but never loved any of my attempts 100%, but I decided to forgo the ones I saw online and try my own design. Here’s how it went.

wpid-20140112_205432.jpg

There’s my tee shirt. It’s awesome, but huge!


wpid-storageextSdCardDCIMCamera2014-01-12-22.11.44.jpg.jpg


I found a tank top I already own that has the look I want for my DIY tank.


wpid-20140112_205711.jpg

With a pencil, I traced the shape of the top of the tank (armpits and neckline) leaving about 1/2″-3/4″ perimeter because I know that tee shirt material tends to roll in on itself and get a little smaller.

wpid-20140112_210936.jpg

I cut on the lines I drew and also took off the bottom inch or so of the shirt.

wpid-20140112_211449.jpg

I placed the tank top over the shirt again, and cut along the same silhouette as the tank. Next, I poked holes through both layers of the shirt (front and back) with a needle every 30mm down the sides of the tank, where I’d just cut, about 3/4″ from the edge.

wpid-20140112_215733.jpg

I cut a red tee shirt so I had a long strand and tied it through the holes like you would a corset or shoe. (You could obviously use yarn, shoelaces, or anything else you have on hand.) After lacing it up on both sides, I put it on and loosened the “laces” until it felt comfortable.

wpid-storageextSdCardDCIMCamera2014-01-12-22.09.54.jpg.jpg


Ta-da! One less work-out or summer shirt to spend money on, right? 🙂

Weekly Allowance: $60.00
Weekly Allowance Remaining: $60.00

J

Up-cycled knitting.

I’m kind of piggy-backing on yesterday’s post about my kind-of-lucrative hobby, but I must share a recent knitting mini-project I did one night this week.

I had discovered a tutorial on how to make yarn out of unwanted tee shirts. I have drawers full of tee shirts from various races, volunteer events, and… of course… impulse purchases. A year or so ago, I started making some into a quilt (which is now sitting half-finished in a box somewhere) but I had many left over. The tutorial was so easy to follow that I was able to knit washcloths and other small square items with the “yarn”.

potholderI hadn’t thought to do this in a long while, until earlier this week my fiance handed me a XXL plain army-green tee shirt that he had gotten for free but didn’t want. The thing was so large I could’ve made it into a pillow, but I realized, “Hey, this could make a ton of tee shirt yarn!”

And so it begun: I made a thing. Not just any “thing” – a pot-holder!

BASIC POT-HOLDER

You Need…

  • US size 9 straight needles
  • Tee shirt yarn
  • Finishing needle, for weaving in ends

Knitting Skills Needed…

  • Cast on
  • Cast off
  • Knit
  • Purl
  • Moss/seed stitch

Steps…

  1. Cast on 15 st using your favorite method (I use long-tail)
  2. (k1 p1) rep to end
  3. (p1 k1) rep to end (this is two rows of seed stitch)
  4. k1, p1, k to last 2 stitches, p1, k1
  5. p1, k1, p to last 2 stitches, k1, p1
  6. Repeat steps 4 and 5 until it reaches a square length, ending in step 5
  7. Repeat steps 2 and 3
  8. Bind off, but do not break or cut the yarn
  9. Using tail, make a loop if you want to be able to hang your pot holder on a hook or something. I made my loop thicker by pulling the yarn in on itself a few times, making a chain-like strand.
  10. Tie the end of the loop at the last bound-off stitch. Break yarn.
  11. Weave in ends.

It’s very thick so I’m totally comfortable using this for holding hot pots and as a trivet. It took less than 20 minutes to make! Wham! Bam!

As far as my budget goes, this week has been easy. Having just gotten back from the holiday break, I have so much going on in the office that by the time I get home, I just cook, eat, exercise, shower, and go to bed – no time for fluff! But, this will change.

On Thursday night I am going to a trivia thing at a bar with coworkers. I’ll probably just get a pint of Guinness draft (usually cheap, and very filling so I will only need one) and something like soup or an appetizer for my meal. Goal: spend less than $20.

On Friday night I’m hosting a ladies night at my house, watching movies and drinking and eating. Luckily most folks will be bringing snacks and drinks, but I have to provide dinner. I have to make a decision: use what’s in my apartment, or buy stuff to make something else with. I have some frozen tortellini which are really yummy, and plenty of pasta sauce. But, most of the previous hosts made stuff from scratch, so I will kind of feel like a schmuck. I really want to make a quiche, but I’m low on eggs and have no cheese, so I’ll have to spend money on that stuff.

We’ll just have to wait and see what happens.

Weekly Allowance: $60.00
Weekly Allowance Remaining: $60.00

J

Make saving fun: get a hobby!

There are plenty of hobbies that are expensive: video games, sailing, RV-ing, building model planes, particle acceleration, etc. Not entirely budget-friendly, no matter how much fun they are. (And usually the things that are the most fun are the costliest, aren’t they? Le sigh…)

Well, I started a hobby just over six years ago that has proven to be a very cost-effective one.

Knitting is pretty freaking great, if I may say so myself! I haven’t knit a sweater or any other kind of large wearable item yet, but I haven’t had to purchase a pair of gloves, a hat, or a scarf in years! Case and point:

hmprod

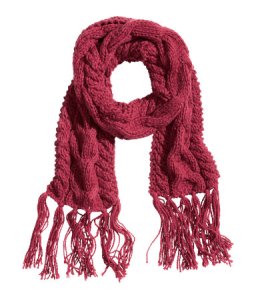
Scarf from H&M = $17.95

Yarn = about $7, but you can get cheaper yarn than this specific brand for as little as $3.

Needles = free, if you already own the pair; $3 or less, depending on the brand, if you need to buy new (but then you have them for future projects!)

Savings = at least $7.95… and this is a reasonably-priced scarf! Imagine the savings if you compare to this $65 infinity scarf (same type as the yellow one in my photo above, which cost less than $5 to make) or this $40 beret (similar to the purple one in my photo above, where I also have the purple finglerless gloves on)!

I wasn’t one of those people who was surrounded by crafts all the time. I knew my late grandmother knit, but had never witnessed it myself. I was so bad at using a sewing machine that when I had to take Home Economics in the 7th grade, I had to stay after school because my teacher said the pillow I was sewing was so bad that I would fail the project if I didn’t start over. I was never destined to be in fashion, that’s for damn sure.

But, in college I impulsively purchased some knitting needles, a book, and some yarn. To this day, I still don’t remember why in the world I chose knitting. I simply did. I tried to knit a simple square… and failed. I don’t remember exactly why I was so frustrated, but I was so pissed off after the first week or so that I crazily threw all of my newly-purchased knitting supplies under my bed, never to be seen again…

…until a couple of years later.

My now-fiance constantly held this over my head. “Oh, so you want to try [random new activity/hobby/thing]? Are you going to give up on it like you did with that knitting stuff??” (Obviously he knew early on in our relationship that I needed help with my impulsive purchases!) To shut him up, I dusted off my knitting stuff and tried again. Lo and behold… I did it. I knit a square and turned it into a fingerless glove. I knit another and had a pair. (I gave them to my fiance because they were too big on me, and he still has them to this day.) I knit a scarf… then donated it because it sucked… but knit another, and another. I knit more gloves. I knit hats and gloves and little purses for family members and friends. It was great, and it still is.

I’m now part of a knitting group where we go to bars, drink, chit-chat, and knit (though we do have plenty of members who crochet, cross-stitch, and do needlepoint, too!). I’m technically the co-founder, to boot, which is still strange to me. A hobby that I failed and gave up at six years ago is now something I’m leading? Man, oh, man.

Tip: find a fun hobby that saves you money, too. Maybe it’s canning, pickling, and/or fermenting home-made jams, jellies, sauerkraut, veggies, and fruit. Maybe it’s quilting. Maybe it’s re-finishing furniture that you find on the curb in your neighborhood. Maybe it’s brewing beer. If it saves you money (or earns some extra cash on the side), it’s a win-win.

Weekly Allowance: $60.00
Weekly Allowance Remaining: $60.00

J